> For the complete documentation index, see [llms.txt](https://docs.world3.ai/world3/llms.txt). Markdown versions of documentation pages are available by appending `.md` to page URLs; this page is available as [Markdown](https://docs.world3.ai/world3/how-to-guides/routerlink/tutorials/how-to-integrate-routerlink-in-chatboxai.md).
# How to integrate RouterLink in ChatboxAI
{% hint style="info" %}
This documentation is provided for informational purposes only and demonstrates how to configure and use our API with third-party AI chat interfaces. Any third-party software, websites, or services mentioned are not operated, controlled, or endorsed by us.
{% endhint %}
## Overview
This tutorial guides you through integrating **RouterLink**—WORLD3's decentralized AI model routing infrastructure—with **ChatboxAI**, a versatile AI client application available across multiple platforms.
### Purpose
RouterLink provides a unified API endpoint that routes requests to multiple AI model providers through a decentralized network. By integrating RouterLink with ChatboxAI, you gain access to a diverse range of large language models (LLMs) without managing multiple API keys or provider-specific configurations.
### What You Will Learn
By completing this tutorial, you will:
* **Configure ChatboxAI** to connect with RouterLink's API endpoint
* **Authenticate** using your RouterLink API credentials
* **Add and manage AI models** available through the RouterLink network
* **Execute inference requests** through ChatboxAI's conversational interface
### Prerequisites
Before proceeding, ensure you have:
* A RouterLink API key (obtain one from the [Quick Start Guide](https://docs.world3.ai/world3/how-to-guides/routerlink/quick-start-guide))
* A web browser with internet access
* Basic familiarity with API configuration concepts
***
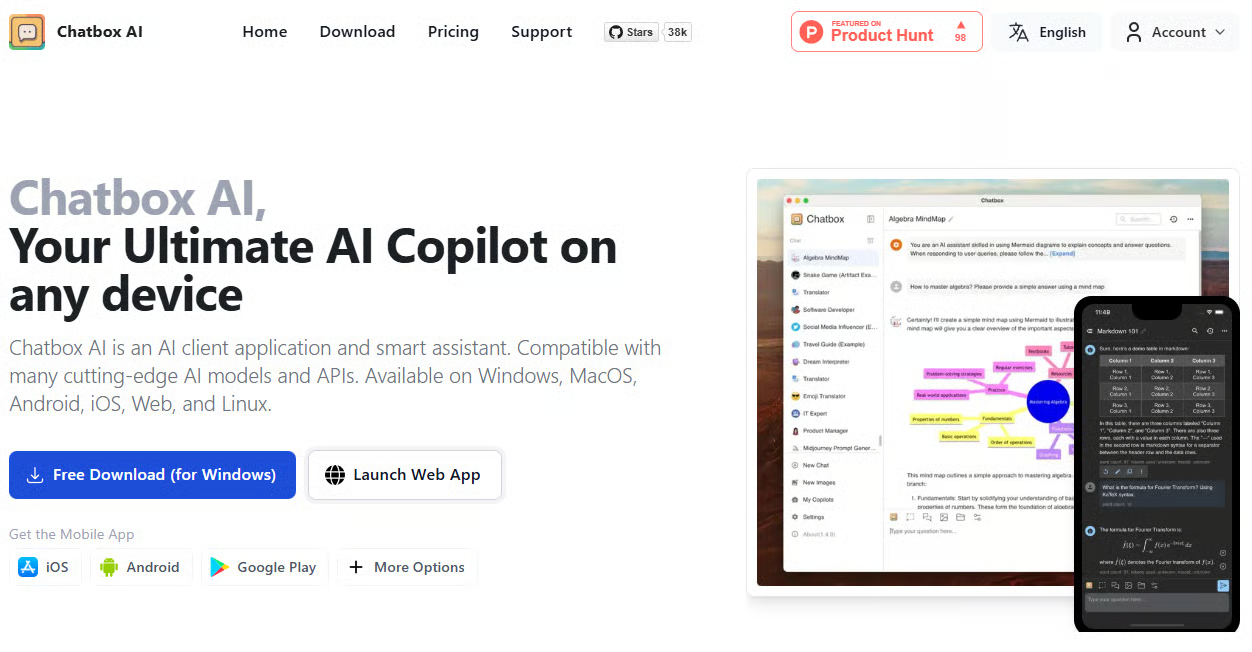
## Introduction to ChatboxAI
**ChatboxAI** is an AI client application and smart assistant that provides a unified interface for interacting with cutting-edge AI models and APIs. It offers cross-platform availability on Windows, macOS, Android, iOS, Web, and Linux.
Key features include:
* Multi-provider model support with custom API configurations
* Cross-platform availability (desktop, mobile, and web)
* Clean and intuitive user interface
* Support for multiple concurrent model configurations
***
### Step 1: Access ChatboxAI
Navigate to to access the web version of ChatboxAI.
***
### Step 2: Configure a New Provider
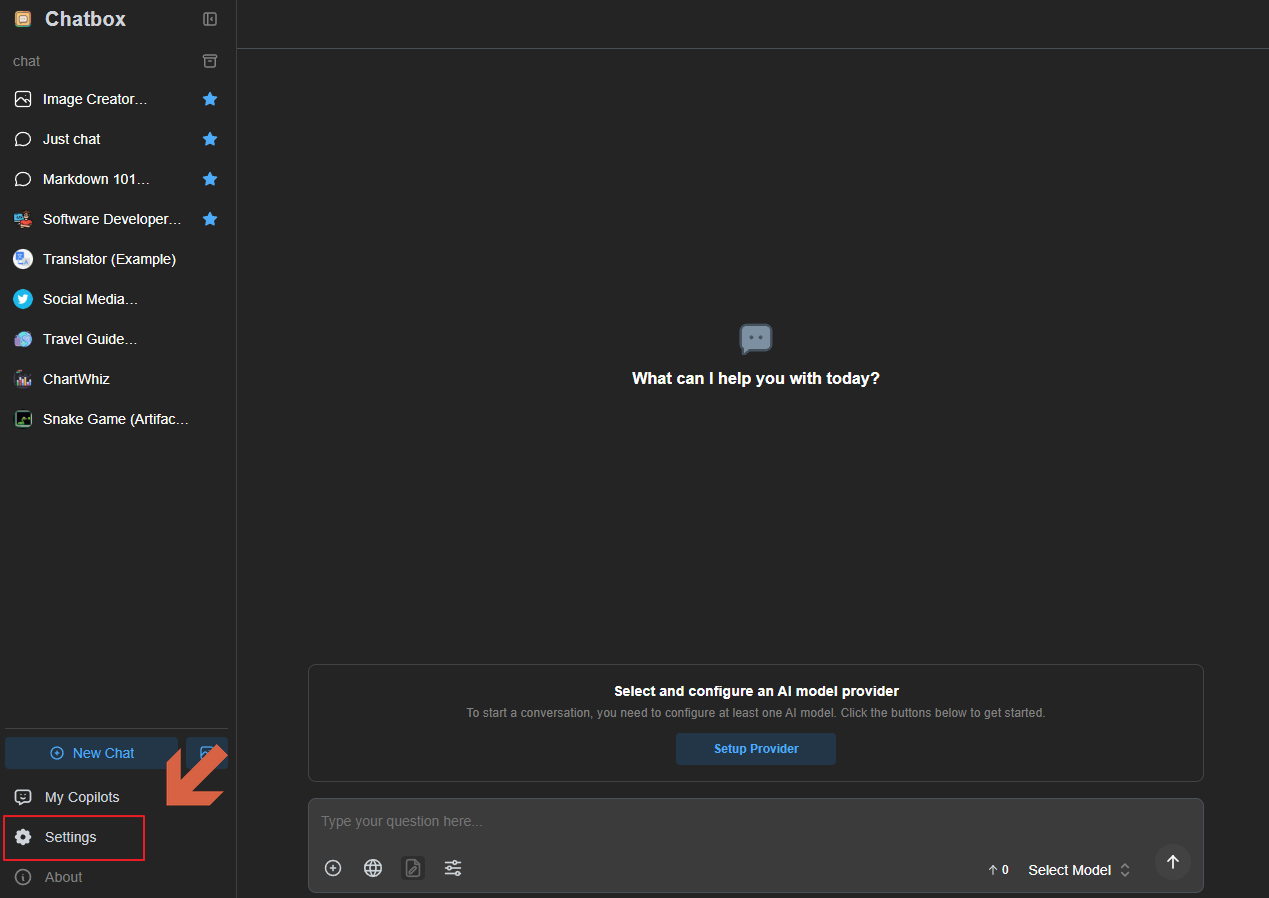
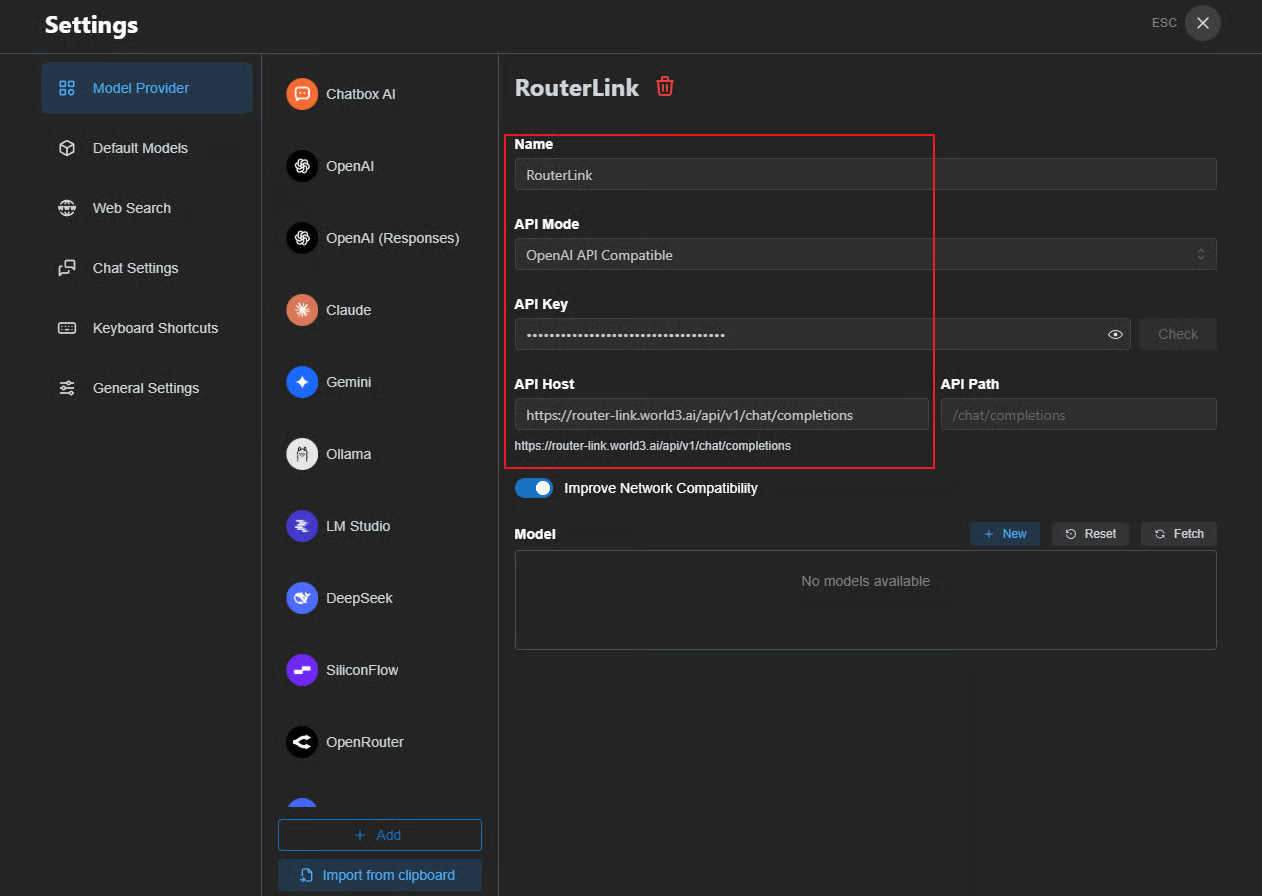
1. Click **"Settings"** located in the bottom-left corner of the interface.
\
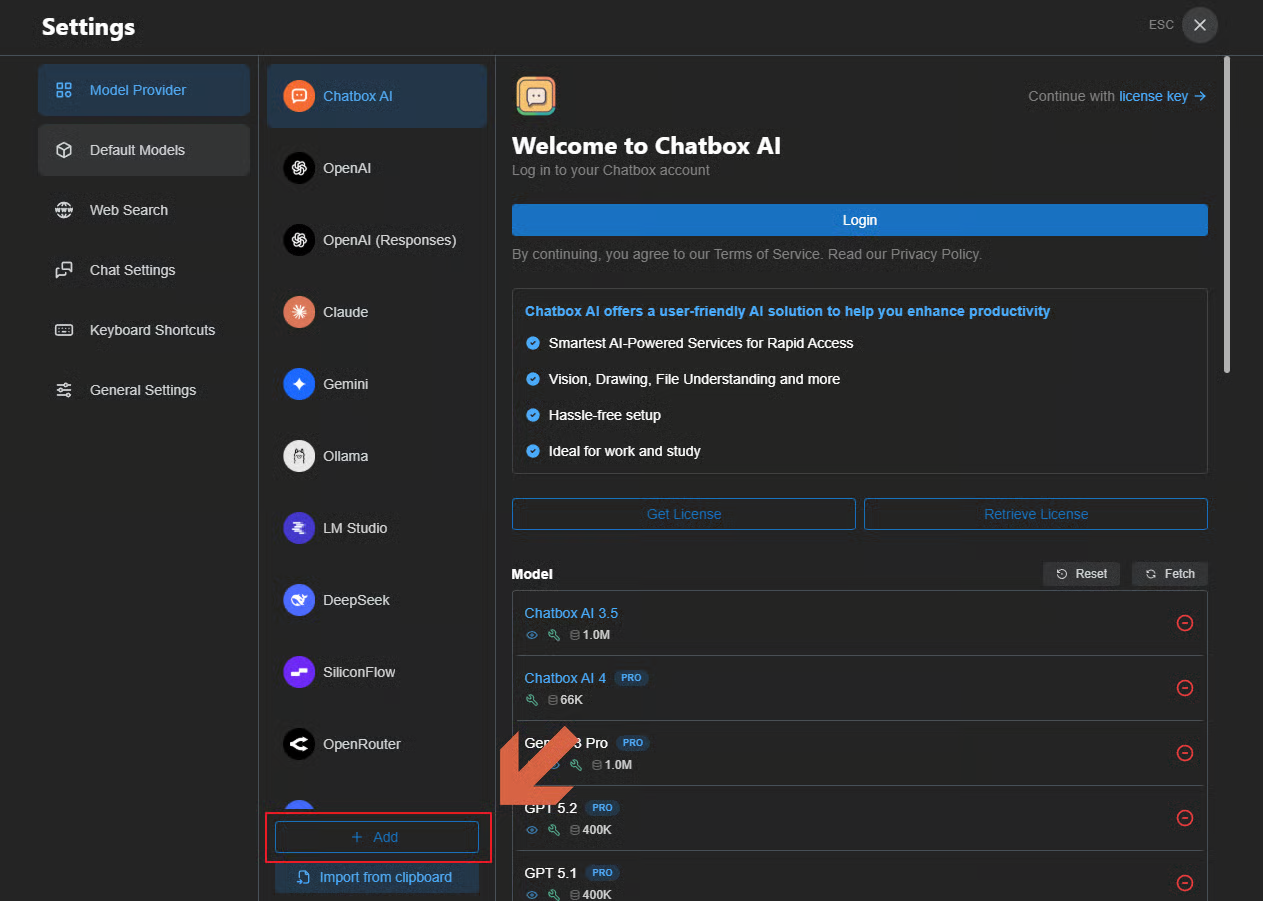
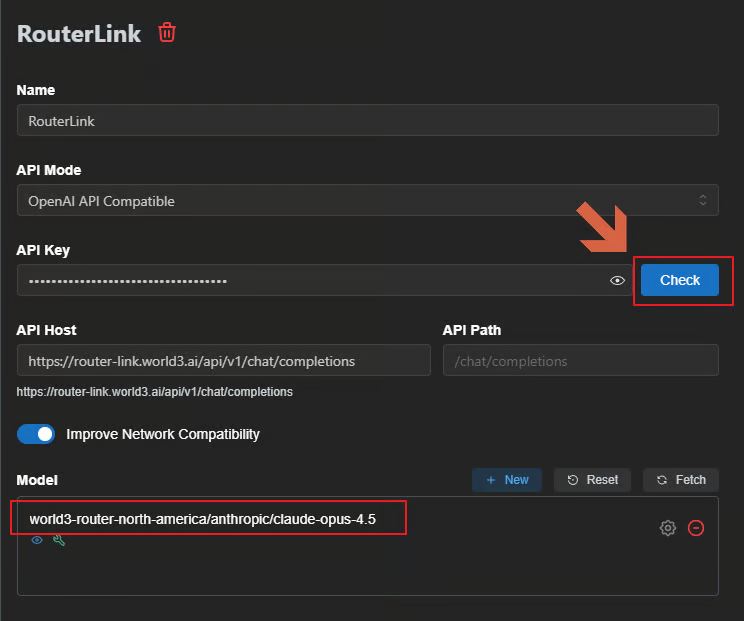
2\. Click the **"+ Add"** button in the bottom-left area to add a new provider.
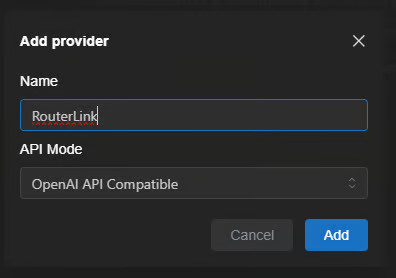
3. Configure the provider with the following parameters:
#### API Configuration Parameters
| Parameter | Value |
| ------------ | ------------------------------------------------------------------------------------------------------------------------------ |
| **Name** | A descriptive name (e.g., "RouterLink") |
| **API Mode** | Select the appropriate API mode |
| **API Key** | Your RouterLink API key from the [Quick Start Guide](https://docs.world3.ai/world3/how-to-guides/routerlink/quick-start-guide) |
***
### Step 3: Retrieve Model Configuration from RouterLink
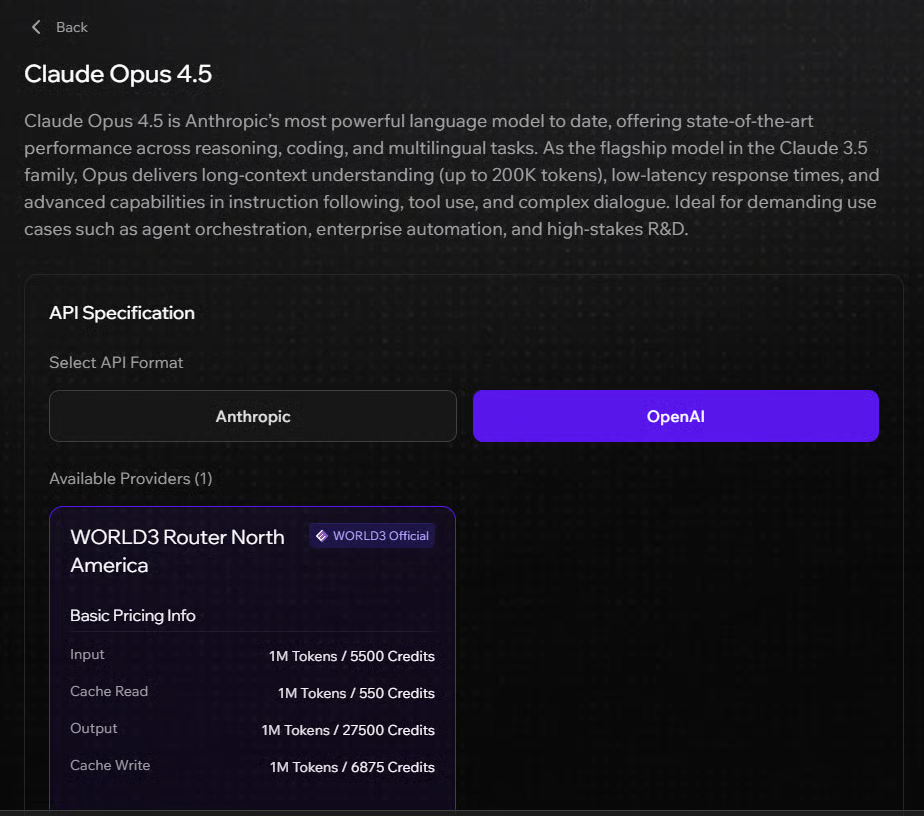
For this tutorial, we will configure **Claude Opus 4.5** model via RouterLink.
1. Visit the RouterLink model page at [Claude Opus 4.5](https://world3.ai/routerlink/Claude%20Opus%204.5) to access the integration details.
2. Select **"OpenAI"** as the integration format.
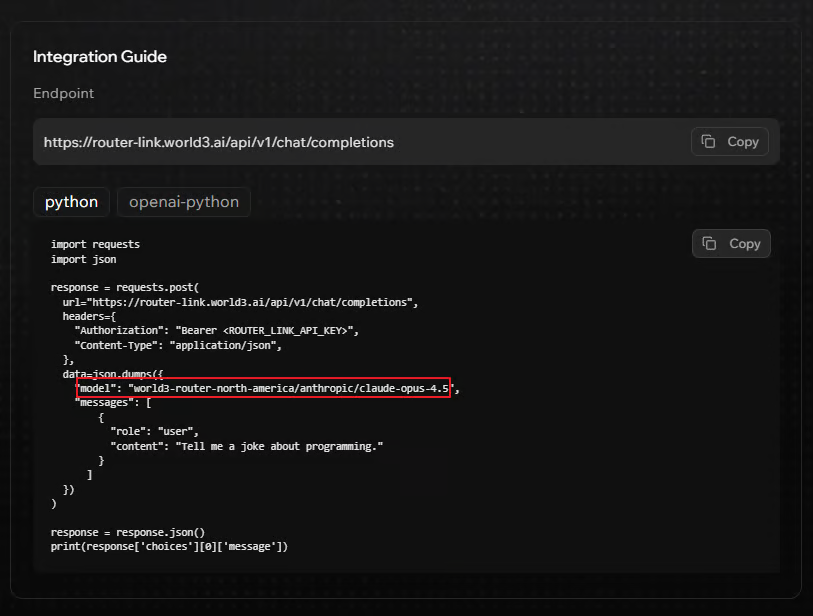
3. The following configuration details will be displayed:
4. Copy the **Endpoint** value and paste it into the **API Host** field in ChatboxAI.
***
### Step 4: Add the Model
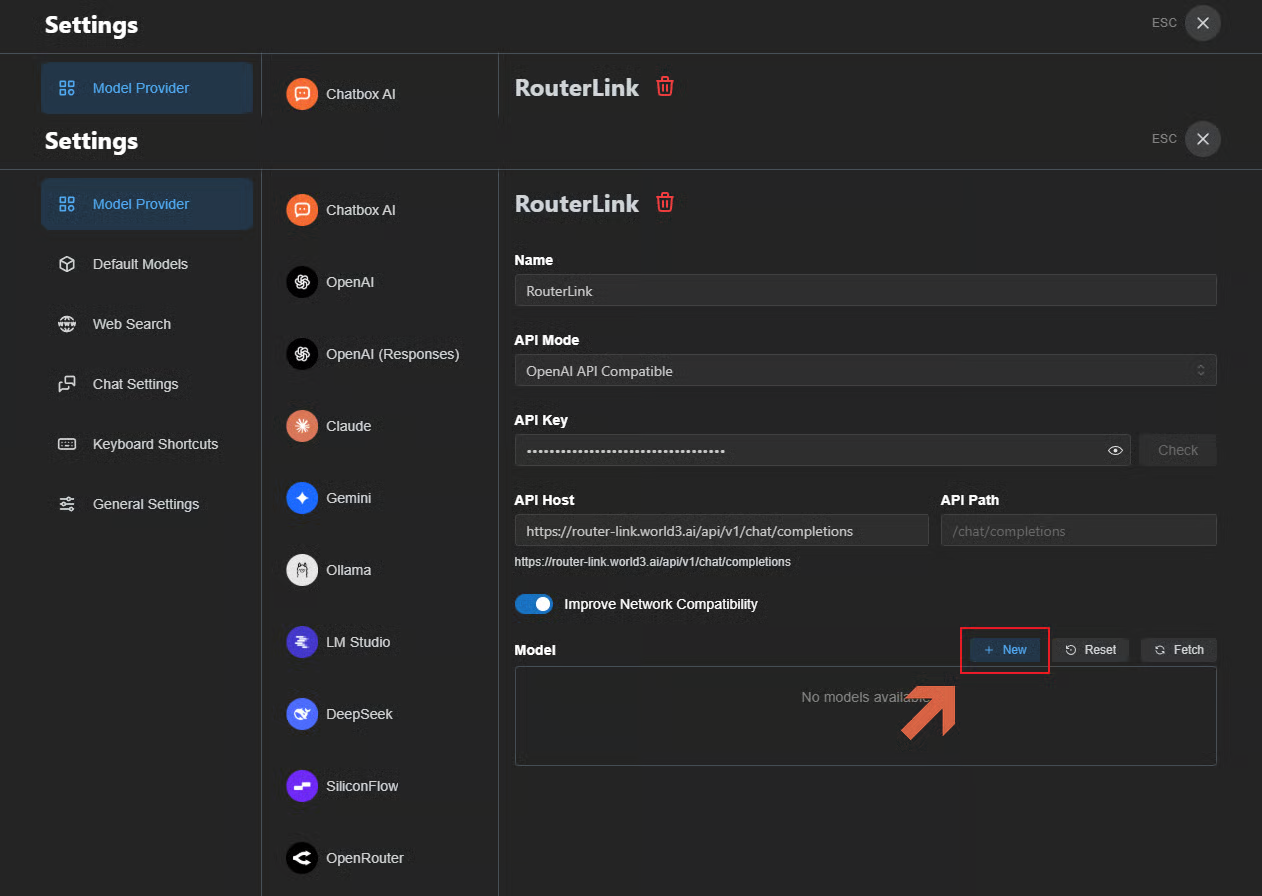
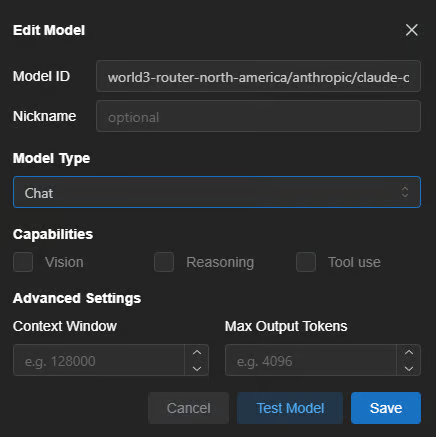
1. Click the **"+ New"** button to add a new model.
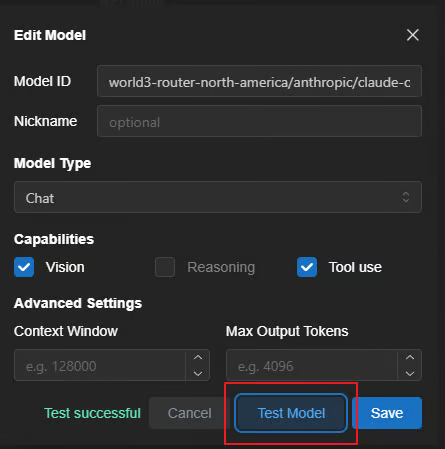
2. Copy the model identifier from the RouterLink website and paste it into the model field:
```
world3-router-north-america/anthropic/claude-opus-4.5
```
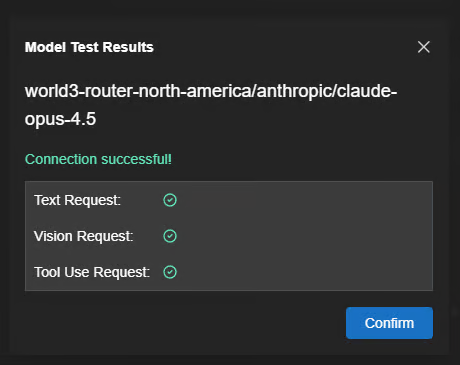
3. Click the **"Test Model"** button to verify the connection. Upon successful validation, "Test successful" will be displayed in green.
4. After clicking the **"Save"** button, the model will be registered in your provider configuration.
5. Click the blue **"Check"** button to complete the configuration verification. All connections should display "successful" status.
***
### Step 5: Initiate a Conversation
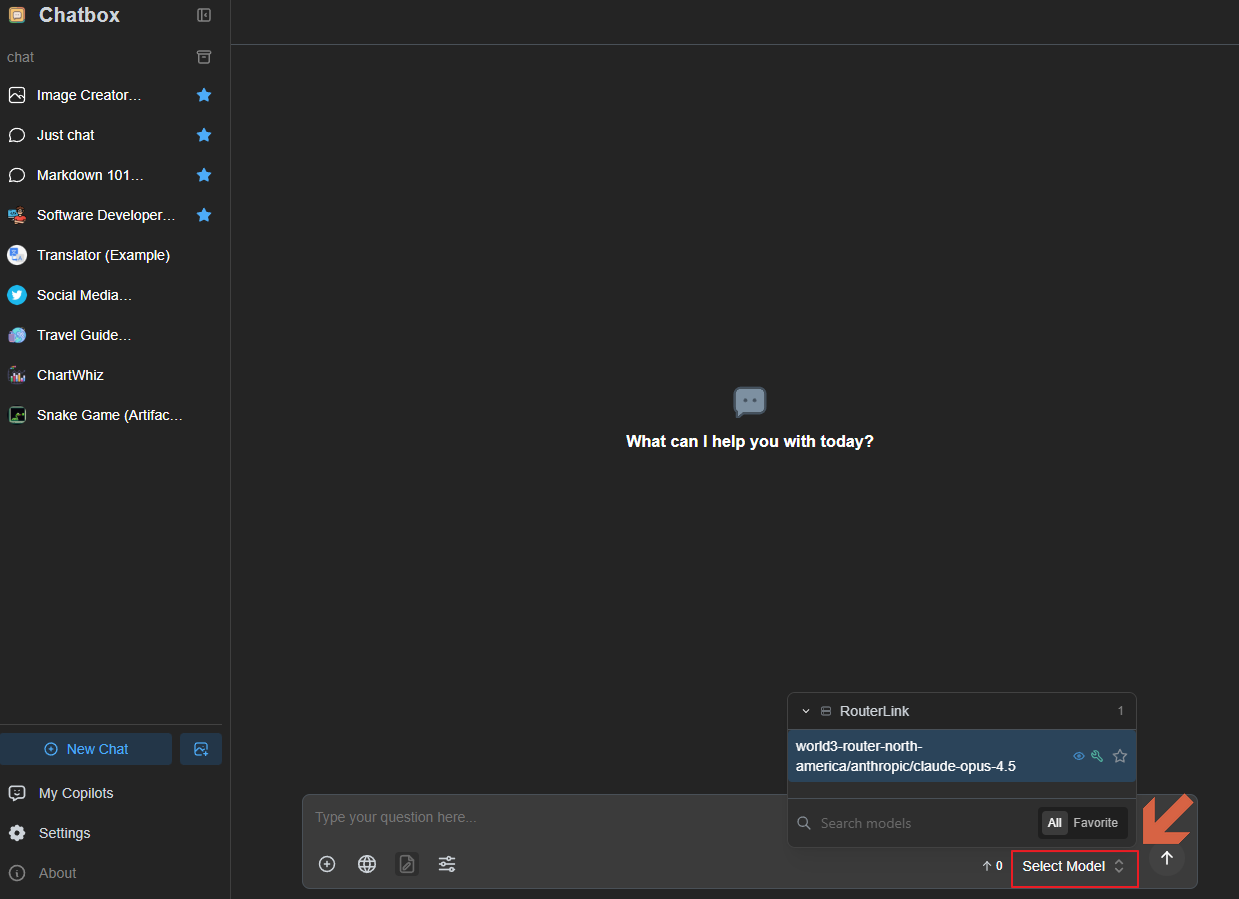
1. Click **"Select Model"** in the bottom-right corner and choose the RouterLink model you just configured.
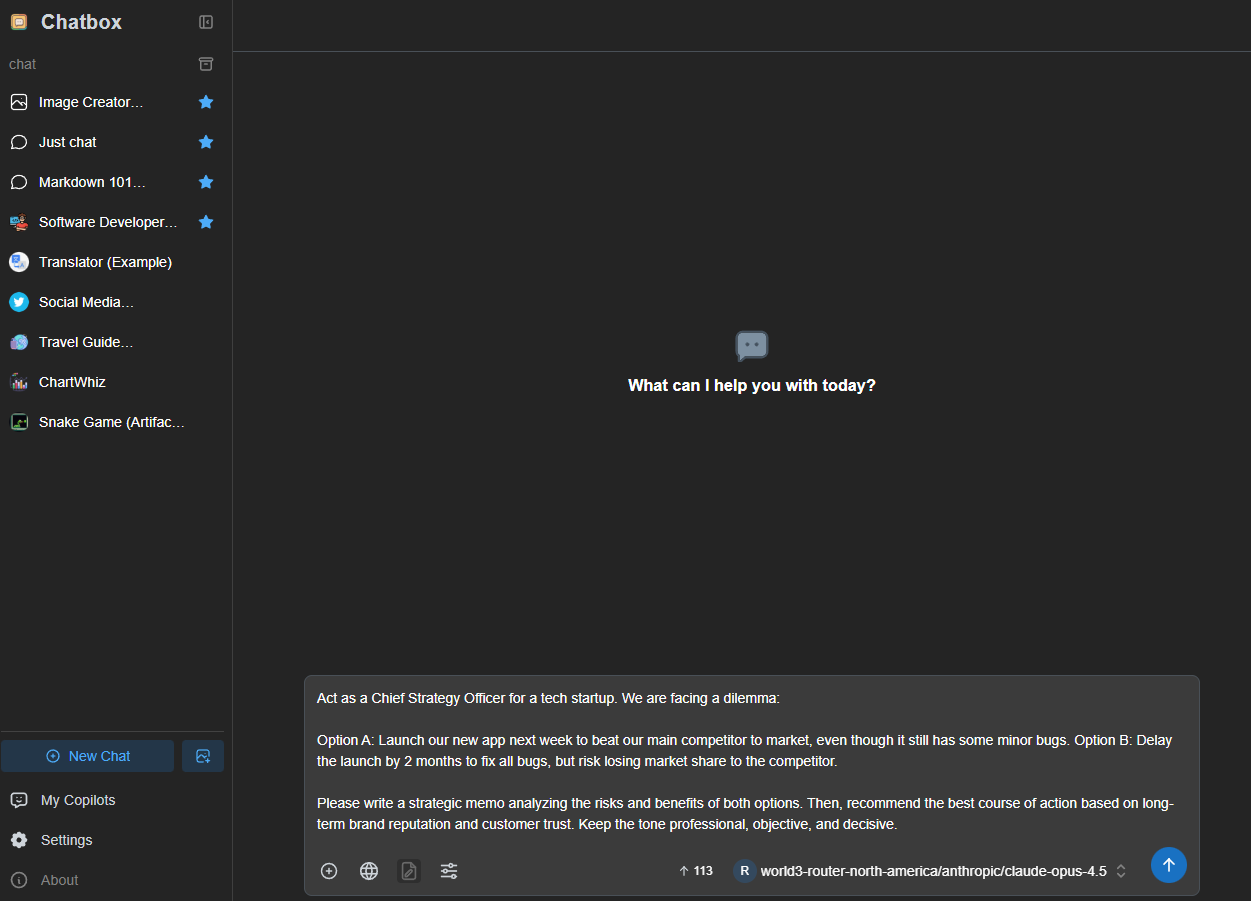
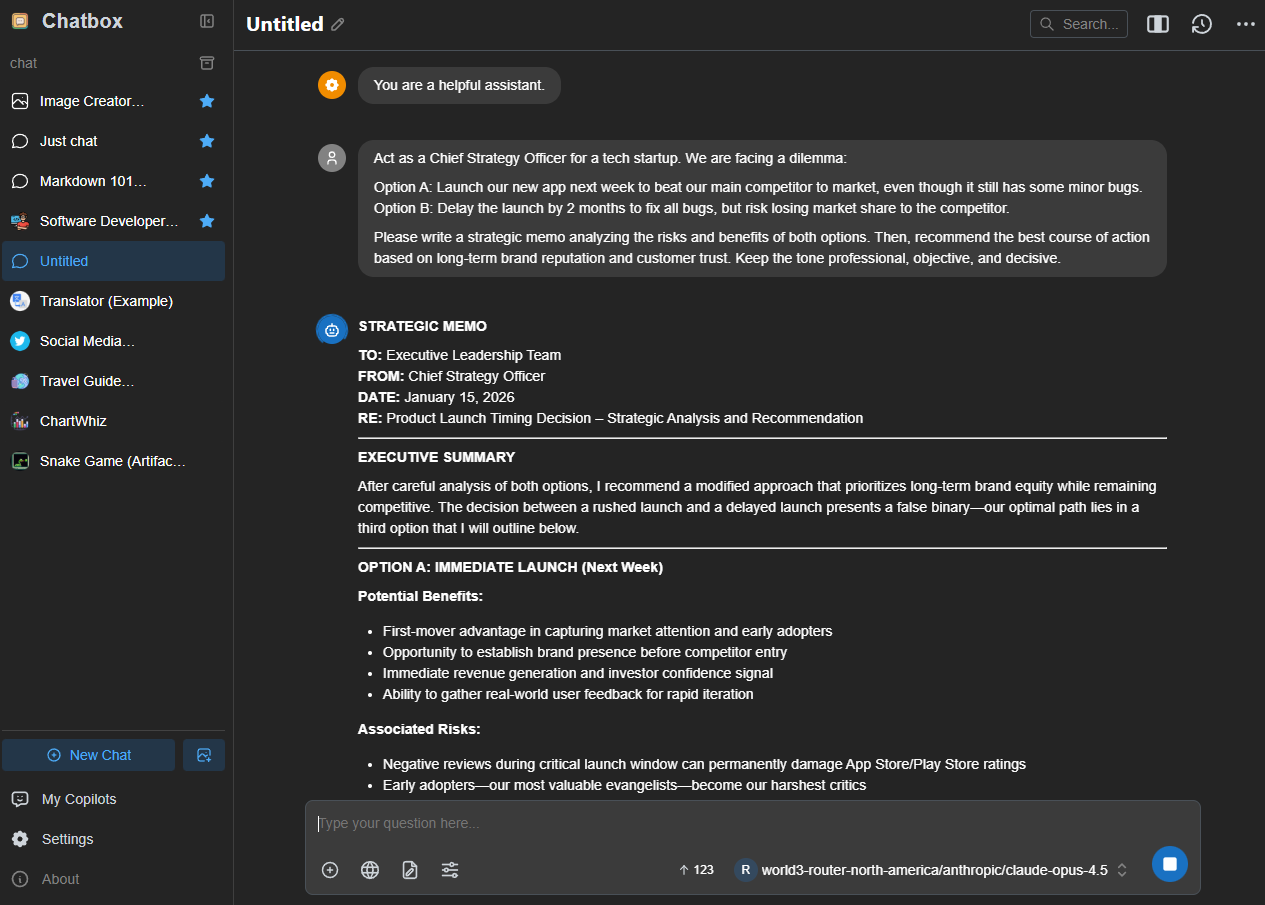
2. Enter your desired prompt to confirm the integration is functioning correctly.
3. If you are using the free daily WORLD3 credits, please set the max tokens to ensure the service works properly (for example, set it to 4096).
***
## Summary
You have successfully integrated RouterLink with ChatboxAI. You can now:
* Send prompts to various AI models through RouterLink's decentralized routing network
* Switch between different models available on the RouterLink platform
* Leverage ChatboxAI's interface features while utilizing RouterLink's infrastructure
For advanced configuration options, model availability, and API documentation, visit the [RouterLink Documentation](https://world3.ai/new-agent/router-link).
***
## Troubleshooting
| | |
| ------------------------- | ------------------------------------------------------------------------------- |
| **Authentication failed** | Verify your API key is correctly copied without leading/trailing spaces |
| **Model not responding** | Confirm the model ID matches the exact format from the RouterLink documentation |
| **Connection timeout** | Check your network connectivity and ensure the API Host URL is correct |
| **Test model fails** | Verify the endpoint and API key are properly configured |
For additional support, please open a ticket on [Discord](https://discord.gg/world3).
## Links
* Website: [https://routerlink.world3.ai](https://routerlink.world3.ai/)
* Litepaper:
* Genesis Program (Alpha Phase):
* Twitter: [@world3\_ai](https://twitter.com/world3_ai)
* Discord: [discord.gg/world3](https://discord.gg/world3)